
Roll Out Ye Olde Barrel!
- Household use?
- Animal drinking water?
- Garden Watering?
- Car Washing?
- All of the above?
- Plastics manufactures and retailers, look under plastics in the yellow pages
- food handling companies such as bulk food retailers, hotels and large restaurants sometimes have barrels that stored food. After washing, these containers are safe to drink from. Olive barrels are a good example
- Check the different classified services such as buysell.com , kijiji.com or this little gem: The Calgary materials Exchange Gateway
If you want to drink the water there are a few filters you will need to run the water through. Catching water for drinking is another article altogether, which I may write one day.
I once found a supply of old Coke syrup barrels from Coca Cola Ltd. The plastic was food grade but was not UV resistant. The barrels eventually became brittle in the sun, and cracked. If you are using clear or white plastic food-grade barrels, the chances are that the plastic is not UV resistant. I have seen olive barrels used that are dark in colour, but these barrels are coveted and hard to find at any price.If you are only going to use the rainwater on your garden, then I would suggest searching around the car wash businesses. I was lucky enough to get some through a family member that works for a car dealership. The barrels that contain detergents are easy to rinse out and any residue thereafter would not be toxic to plants or humans (still, I wouldn’t drink from it). I managed to get my hands on 3 barrels to date, but have made the rack to accommodate 4 barrels.So, if you’ve got a barrel, now you need some wood for the rack. Later you will want to connect all the barrels together which requires some plumbing pieces.
I’m proud to say that I didn’t pay for any of the materials except for screws and glue. Remember my new favorite saying: “The greenest product is the one you don’t buy”. Think creatively when sourcing materials. The bottom line is that you will need these parts:
- 4×4 posts for legs, the longer the better
- 2×8 for the rails and side , 2 at 6 feet and 2 as long as your barrels
- screws
- construction glue (PL400 by LePage )
2 Posts Become 4 Legs
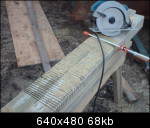
I’ve had 2 4×4 posts that were 8 feet long. At the top of each leg I want a lap joint for the rails. I clamped them together and marked a line at 4 feet, then I made marks for the lap joint.
The first cut was at the mark, where I would later cut right through the posts. This cut was made as deep as my saw would allow.
I set the depth of my saw blade using a scrap of 2×4 for cutting the lap joint


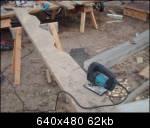
Now your ready to cut “hash” marks across all the waste wood you will be taking out. Here’s what mine looked like before I got the chisel and hammer out.
Now I chiseled out all the waste and cleaned up the face for a nice lap joint. After I did that, I cut the middle kerf with a hand saw – a tool that has no carbon footprint, ha!
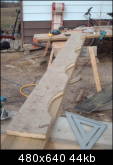
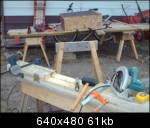
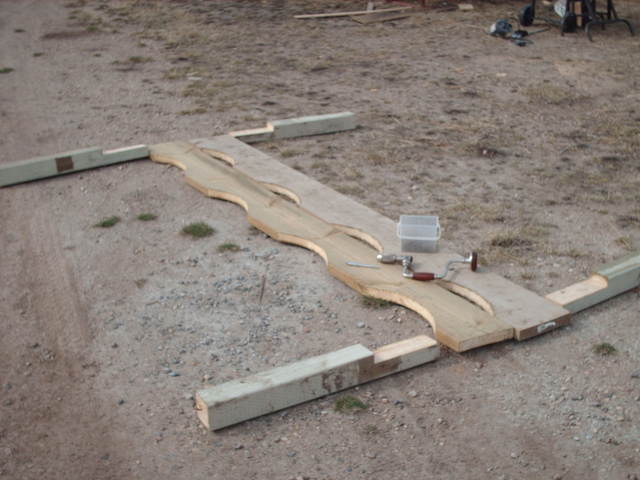
To get the rails started I cut them to length, then took a barrel and used an edge to trace a pattern on the wood. Then I used the cut-out scrap to make the remaining cut-outs. Remember to space your “seats” for the barrels enough that they do not overlap when side-by-side. I measured the diameter of one barrel, added 2 inches, then made the next arc.
So where is the electrical conservation?
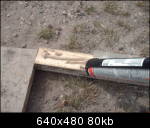
I decided to pull out my brace and bit to do the screwing.

Yes, I have a cordless drill, but it uses electricity. So, I put the glue on, screwed one screw into each leg, then squared up the leg to the barrel rack. After the legs were perpendicular to the rack I finished screwing with my old tool brace.

This is a “to be continued” post so you’ll have to wait for Rain-barrel Rack Part TWO
Photos are Uploaded with ImageShack.us